Month: April 2020

How To Lay Down A Lino Flooring And Common Mistakes To Avoid

Lino flooring, also known as linoleum flooring, is a synthetic material made of [material], which is highly durable, cost-effective and is printed in a variety of styles to look like wooden planks or stone slabs.

Lino is a perfect flooring choice for kitchens and bathrooms as it’s waterproof, easy to mop up spills on and if properly maintained, can last for 10-20 years.

Lino is sold in wide roles of flexible material that can be easily cut to shape to fit any room, making it easy for you to lay down yourself. However, laying down a lino floor isn’t as simple as rolling out a new rug.

We’ve put together this handy guide for how to lay down a lino floor, and common mistakes you should avoid.

How To Put Down Lino Flooring

1. Work out how much lino flooring you need to fit by working out the total area of the room. To do this, simply multiply the width of the room by the length and this will give you the total area the room covers.

2. So for example if you have a 5m x 4m room, the total area of the room will be 20m², so you will need that much lino.

3. However, it is work noting that you should make sure that the lino you do put down has an additional 100mm of length either side in order to avoid leaving any gaps at the edges of the floor of the room.

4. Remove any old flooring material from the floor and lay down any underlay if you.

5.  Roll out your lino flooring onto the rooms floor, leaving some overlap at the edges of the room so you can cut it to size.

6. Using a retractable stanley knife, cut the lino around the edges of the room and lay flat.

7. Cut the lino around awkward pieces such as sinks, toilets and pipes that may be running out of the floor.

Can you put new flooring over old lino?

While there isn’t anything to stop you from laying down new lino flooring on top of old lino, we would strongly recommend against this.

While linoleum flooring is resistant to germs, mould can grow on it’s surface under the right conditions. If you lay new linoleum flooring down on top of flooring that has mould on it, even if you can’t see it with your naked eye, the mould can spread and present a health risk.

Do you need underlay for lino?

Tips For Laying Down Lino Flooring In Awkward Spaces

If you’re laying down lino flooring in a bathroom, it is more than likely that you will have to fit your lino flooring around the base of a sink.

The best way to fit your vinyl flooring around this is to cut the sheet around the object, leaving roughly 100m extra around the edge of the object. From there it will be easier to trim the sheet to fit the lino flooring around the object.

Common Lino Flooring Fitting Mistakes To Avoid

    Using a blunt knife or one that’s wide than a thin stanley knife will make it much more difficult to cut the lino flooring to shape when you’re laying it down. This will not only mean that you’re putting yourself at greater risk of slipping on the lino surface and cutting yourself but also it will be trickier to cut the lino sheet to the size of the room and can potentially leave gaps along the edges of your floor.

Not taking the time to measure a room before you purchase or cut a sheet of lino flooring runs the very likely risk of not being able to fit your new flooring properly

High Quality Lino Flooring In Sheffied from Pyramid Carpets

If you’re looking to revamp the floor of your kitchen or bathroom, we stock a wide range of lino flooring sheets in a variety of styles, at great prices. We also offer a friendly floor fitting service for our customers.

Speak to our team on 0114 255 5553 or get in touch through our website.

The post How To Lay Down A Lino Flooring And Common Mistakes To Avoid appeared first on Pyramid Carpets – News.

New Flooring To Reduce Your Chances of the Coronavirus

As we continue to move forward as a society in the midst of the coronavirus, one thing is for sure: we don’t have a great understanding of prevention methods. Of course, this will change over time. But right now, when you want to do right by your family, it’s difficult to know what to do. It’s hard to separate fact from fiction, and rely on the right resources for the information you need now.

Every industry, every niche, is scrambling to figure out the best direction to go. Flooring is no different. We’re continually evaluating the impact of the coronavirus and how it can be distributed between people.

What we do know

The best course of action is to follow the advice from leaders who make it their business to learn more about taking action.

The CDC has general guidelines for how to clean and disinfect different items in your home.

For hard surfaces – non-porous surfaces:

  • Wear disposable gloves while cleaning and replace them after each cleaning. If you use reusable gloves, be sure to clean and disinfect them immediately after use.
  • Clean all surfaces before you disinfect.
  • Use an EPA registered cleaner to ensure appropriate cleaning and disinfection. Use them according to guidelines to avoid health problems.

New Flooring To Reduce Your Chances of the CoronavirusFor soft surfaces – porous surfaces:

  • This includes things like carpet and rugs. Clean with an EPA-registered cleaner according to manufacturers guidelines.

At this point in time, we’re still not sure how long the coronavirus can remain on various items throughout your home. It depends on the surface structure – is it porous or non-porous? Studies show it can survive anywhere from 2 hours to a couple of days, depending on the surface.

Of course, it’s important to restate that at this time, we just don’t know.

Which makes cleaning your surfaces and installing the right materials in your home that much more important.

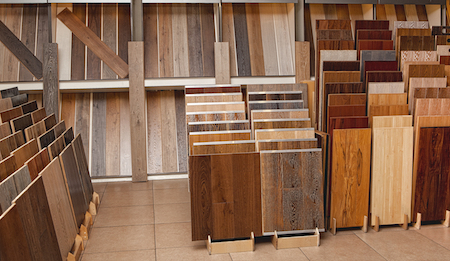
Porous vs Non-Porous Flooring

There are many ways to separate out flooring. When you think about cleanliness and the ability to keep it clean, thinking in terms of porous and non-porous flooring can help you determine the right flooring choice for your home.

A non-porous floor stops soil and moisture from penetrating within. These would include things like glazed ceramic tiles, glazed porcelain tiles, and vinyl.

Porous floors would include materials including non-glazed tile, carpet, and hardwood.

A non-porous floor is easier to clean. That’s why they are commonly found in commercial applications, especially warehouses, medical facilities, and schools.

Porous flooring is often found in residential settings because of its ease of use and comfort features.

Will we start to rethink our flooring choices because of the coronavirus? Only time will tell.

But if you’re considering new flooring for your home, and the idea of installing non-porous options are piquing your interest, we have a few choices in mind.

Vinyl

When many of us think about vinyl flooring, we picture the stuff we found in our grandmother’s bathroom. It was yellowed, curling around the edges, and frankly, not very aesthetically pleasing.

Even today, if you walk the aisles of your local big box store, you might see large rolls of sheet vinyl and think: Nope, not for me. It’s so … clinical. It just doesn’t look very good.

That means you haven’t taken a good look at what today’s vinyl flooring really looks like.

Vinyl is created with synthetic polymer, essentially a plastic that will hold up well in your home. Vinyl is made up of several layers to give you a product that looks great and lasts well too. It has four layers that include:

  • A backing layer made from felt or fiberglass
  • A core layer made from plastic
  • A decorative layer that can imitate some of the best flooring products on the market
  • A protective layer also made from plastic, called the wear layer

In the luxury vinyl tile market – LVT – these flooring choices can imitate stone, tile, hardwood, and more. In some cases, they appear to be so real that even people in the business have to take a closer look to see that it’s not the real thing.

And they handle better than the real thing in a lot of situations.

  • They’re waterproof – they stand up to water and spills, meaning you can clean them well.
  • They’re stainproof – that nonporous surface means common staining items can’t penetrate the surface.
  • They’re comfortable – vinyl has give, making it a comfortable choice if you stand a lot, especially in places like the kitchen.
  • They’re budget-friendly – if you’re looking for an economical way to upgrade your room, look no further than LVT.

Glazed tile

Ceramic tile may be the one flooring choice that looks good in every room in the house. Here in Colorado, you’ll often find it in bathrooms, laundry rooms, and kitchens. But we predict that it will soon be spreading to other rooms in the home as homeowners contemplate their flooring choices.

Glazed tiles have a hard surface that will not attract or hold on to dust, dirt, pollen, or other allergens. That’s a big plus for homeowners where a family member has a compromised immune system. It’s also a plus for homeowners concerned with how easily they can wipe down every fixture in their homes.

Tile is also one of the most versatile flooring products, one that can take on almost any look you desire. Keep it subtle with a neutral color. Go bold with something dark or bright. Create a mosaic effect by mixing colors and sizes. Or create elegance by using modern technology to mimic hardwood.

Yep, that’s possible with today’s technology. Select them in plank style and lay them in similar fashion as your hardwood, and you’ll have the good looks you demand combined with functionality that can last for decades to come.

What’s more, many homeowners are giving this trend a second look because you can install them over radiant heating. If you thought tile was too cold for our Colorado winters, you’ll love having toasty flooring to step down onto even on the coldest of mornings. And because heat rises, what better way to keep your home better temperature-controlled than by having the heat start at the bottom?

What’s the right choice for you?

While none of us know what the future holds, one thing is for sure: we’ll be changing the way we look at our homes.

If your home needs new flooring, and you want a floor that’s both durable and can be cleaned easily no matter what is tracked into your home, consider nonporous flooring – tile and vinyl might make the perfect choice for you.

This post appeared first on https://pro-flooring.com

LVT Cleaning Guide

LVT is a shortened version for Luxury Vinyl Tile flooring.  It has become more and more popular over recent years due to its durability, authenticity and easiness to look after.  LVT is extremely easy to look after and clean.  You will not need an expensive range of cleaning products and the job will be done quickly.  Here is a LVT cleaning guide which we hope will help you.

Read More

Why Vinyl Tile May Be Better Than Ceramic Tile

There are certain environments throughout your home where moisture and spills are more likely to occur. Like your kitchen, bathroom, or laundry room.

It would never make sense to install carpet; can you imagine water seeping into the fibers and padding if your washing machine overflows? Now imagine cleanup if the flooring was water-resistant. It might be a pain, but you wouldn’t worry about the long-term implications.

That is why more homeowners are giving vinyl tile and ceramic tile another look.

But there’s a third thing to think about here in 2020 that will impact the way you live from now on: the coronavirus.

Cleanliness is more important than ever. Having the ability to clean and disinfect is at the top of every homeowner’s wish-lists for new flooring.

Does that make vinyl tile better than ceramic tile?

Let’s take a look.

Vinyl tile or ceramic tile – what’s the difference?

Why Vinyl Tile May Be Better Than Ceramic TilePeople, in general, have very distinct views of both vinyl tile or ceramic tile. They may remember growing up with one or the other, and have opinions about the look and feel of both.

If you haven’t looked at either lately, it’s time for a second look. Through technology, vinyl tile is now designed to mimic some of the most favorite products on the market. But the materials used in production are substantially different, and that can be a plus for you.

Vinyl tile is essentially made from the same thing as the more traditional vinyl sheet. It’s created using four layers:

  • A backing layer usually made from felt or fiberglass
  • A core layer made from PVC plastic
  • A print layer to add the design to your flooring product
  • A wear layer to give it its strength and durability

The difference between tile and sheet is the cut; vinyl tile is simply cut into squares to make it easier to handle and move. And because they’re easier to maneuver, manufacturers have been very creative with the design. You’ll find all sorts of patterns and colors. They even make composite tiles, which adds a sense of realism to more traditional plastic-only by including pulverized stone dust to the mix.

If you’re looking for a step up, you can move to the luxury vinyl tile line, which is much thicker and has tiles that join together through click-together technology. Luxury vinyl tile is found in both plank and tile format, and can take on the look of hardwood, ceramic or stone tile.

Ceramic tile is made up of natural clay mixed with other materials, fired and hardened with a surface glaze to give them their unique appearance. While ceramic tile tends to be a more generic term for the tiles you install in your home, it also includes things like porcelain tile, which hardens at higher temperatures, making them harder and more durable. They have their place in American homes, but keep in mind they do produce one of the hardest surface areas you can install.

Ceramic tile is often used in many ways – why not use it on the walls, countertops, and backsplashes to create a unique look? You would never do that with vinyl tile.

Do each have their place? Of course.

Is there a right choice? It all depends on you, your goals and your desires.

But if you are looking for beauty at an affordable cost, and want something that’s durable and easy to clean no matter how much you clean it, vinyl tile is worth a second look.

Why vinyl tile is growing in popularity

Market trends show that flooring is in demand now more than ever. That’s because people want a low maintenance, cost effective material that’s easy to install. Current statistics show it’s a 25 billion dollar industry, with growth predicted more than 7 percent per year through 2025.

What makes vinyl tile better than ceramic tile in many situations?

Cost

Vinyl tile is one of the most budget-friendly flooring choices you can make. In many cases, vinyl tile will be your only purchase. Compare that to ceramic tile where you’ll have to invest in adhesive, grout, and all the tools that go along with it. Depending on what vinyl tile product you select, you can expect to pay as much as 40 percent less than other popular types of flooring.

Durable

According to an article on Realtor.com, vinyl tile can last up to 20 years if well cared for. That makes it an excellent choice where water-resistance is needed. Plus, the soft cushiony texture is perfect if you have pets or kids, where playing and getting down on the ground is mandatory in your daily life. Ceramic tile’s hard surface means it’s harder no matter what hits it. If you drop a man, ceramic tile can chip or crack. It has a much better chance of bouncing back on a vinyl tile.

Installation

Are you looking for an easy DIY project? With most flooring choices, doing it yourself is often cost-prohibited because of the number of tools you need. If you want to install tile yourself, nothing is easier than vinyl tile. Start by pulling up the current flooring and ensure the subfloor is in good shape. With ceramic tile, the subfloor is less forgiving. If you tile over uneven spaces, there’s a greater risk your ceramic tile will pop off during normal living. Because vinyl tile is flexible, it settles in even with minor imperfections on the subfloor. And with luxury vinyl planks, they click into place without adhering to the subfloor. Their flexibility allows them to settle in and stand up over time.

And did we talk about the mess? If you’ve ever installed ceramic tile yourself, you know all of the stages you have to go through. Ensure the subfloor is level. Mix and apply the adhesive. Cut the tiles … and risk having broken tiles pile up. The dust. The grout! That’s why many people leave ceramic tile placement to the professionals.

Because vinyl tile is so easy to install, you can often have the project complete in one day, depending on the size of your room.

Flexibility

Are you the type of person who loves to keep up with the trends? Are you an HGTV addict? Is remodeling a part of your lifestyle? Then vinyl tile may be the perfect choice for you. Once ceramic tile is laid, it’s difficult to pull up and get your subfloor back into condition for the next flooring to be laid into place. With vinyl tile – especially luxury vinyl planks – with click and lock technology, you pick them up and ready the subfloor for your next flooring choice. That also makes them easy to repair if you damage one of them.

So what’s your flooring choice? Do you agree, vinyl tile is better than ceramic tile for what you’re looking for in a flooring choice?

Give us a call and learn about our complete line of vinyl tile.

This post appeared first on https://pro-flooring.com

Why Tile? Check Out These Bathroom Remodeling Tips To Fall In Love With It

Remember when we wished for more time at home? Thanks to staying in place, our wish has been granted.

If you’ve been using this time to plan out a bathroom remodel, we want to give you a few reasons to consider tile.

Why tile?

Chances are you have tile somewhere in your home. Tile is one of the most popular materials used in construction, and has been for centuries.

If you head back in time, you would find glazed tiles used in all kinds of settings. Because many were handcrafted, they were used for decoration and to add style and pizzazz in aristocratic real estate.

Today, we use tile everywhere. You’ll find it inside and outside. You’ll find it on floors, walls, backsplashes, and countertops. It comes in small mosaics or as large as several feet wide.

But no matter how it’s used, it’s one of the most durable and beautiful materials you can use in almost any setting.

Why Tile? Check Out These Bathroom Remodeling Tips To Fall In Love With ItPeople choose tile for a variety of reasons. If you want something unique, you can create it with tile. If you want a material that will stand up to all your family can dish out, tile is a great choice. Looking for a DIY material? Once again, all arrows point to tile. It truly is one of the most versatile materials you can work with.

How do you get started?

With any remodeling project, the best place to start is with an idea. So you want to remodel your bathroom – what picture comes to mind even before you start looking?

For most homeowners, when they decide to take on a project, they have certain things in mind. Maybe your bathroom is straight out of the 90s – an upgrade is desperately needed.

That’s your starting point. Now it’s time to come up with your ideas.

We always recommend watching home improvement shows, or visiting Pinterest and creating a pinboard with your favorite ideas. Keep in mind that you can’t create a luxurious spa retreat if you only have the space of a tiny bathroom. Be reasonable with your ideas. If you plan on knocking down walls, by all means, dream. But if you have certain specifications that impact your final selection, keep those in mind while you dream.

Where do you want tile?

Very quickly, you’ll discover that tile can be placed anywhere. On the floor. On the wall. On the vanity. Backsplashes. Shower stalls. On the ceiling.

We’re seeing tile used in many different ways today. You can use it as an accent, or as the main attraction. Why not mix them both – interweave small glass tiles with larger stones to create an opulent spa shower.

If you’re doing this yourself, measuring will be the key to your success. Consider the logistics of how your bathroom is laid out, and where you’ll be installing the tile in the end. Will you lift up the toilet and tile underneath? Will you be replacing the vanity and require tile to extend from corner to corner? Will you have to piece a design together around a window?

You’ll also want to keep in mind you’ll probably need extras. If you have to cut pieces to fit into corners, or with a hole to fit your plumbing, you might have breakage. Having extra on hand will ensure the color remains true throughout the project. And if you have even more, you can set some aside in case you stain or break one in the future.

Bring samples into your space

One of the biggest mistakes people make is basing their final selections off of what they see in the store. What looks good in a large open space with harsh lighting will never show you how it will appear when you tuck it into your bathroom.

Narrow your choices down to a few selections. Then bring them home and live with them for a bit. See them in the morning, in natural sunlight, and late at night. One will naturally move forward on your “yes” list, while the others migrate back into the pile.

Trust your instincts. If you don’t like it as a sample, you probably won’t enjoy it for the long term. If your gut says “this is it”, you’re probably right.

Go for the extras

Spa showers are the rage right now. People are remodeling to create space for a walk-in, spa-like shower experience. And we get it – they’re beautiful and functional at the same time.

Yet it’s easy to focus on the price tag and ignore some of the extras that can make your shower even better. That’s where customization comes into play.

If you work with a contractor, chances are they’ll talk with you about storage. Have bottles on the floor always bothered you with your current shower stall? Then why not consider a shower niche?

This is an indention in the wall designed for storage. It provides you with space to keep bottles, soap, brushes, and razors all within easy reach.

It’s worth the effort.

Rely on others

While we’ll always tell you to trust your gut, it’s also important to seek help along the way.

Whether you rely on one of our flooring experts to walk you through your DIY project, or you’re hiring a contractor to do the entire project for you, it’s a good idea to ask questions along the way.

Each of the people you come in contact with has experience in tiling projects. They know what works, what looks good, and what their clients like for years to come.

If they make a recommendation, it’s for a reason. Listen. Then take action.

A contractor’s job is to ensure you’re happy with the result. They won’t push you into specific colors, shapes, or sizes, without reason. They make suggestions because they know what looks good and works well together. Their job is to make you happy – and they do that by making the best suggestions they can with your situation and constraints.

Are you considering a remodeling project? Why not consider tile.

This post appeared first on https://pro-flooring.com

Moving In Tips So You Don’t Scratch Your Hardwood Floors

Have you put your house on the market, wanting to find another place to call home?

Are you building a new home, and can’t wait to move in?

It’s springtime, the most popular time of the year to make a move. According to Census data, the average American will move 11.7 times in their lifetime. That works out to about every seven to ten years.

Of course, we move for many different reasons. We head off to college. We buy our first homes. We upgrade when our families start to grow. We downsize when we return to an empty nest. We’re always in the search for the right amount of space.

But through it all, one thing never wanes; our desire for personalization and classic good looks. We want our personalities to shine in the places we call home. And for many of us, that means having hardwood flooring throughout.

Moving is hard on hardwood floors. While you might start out with the best intentions, after several dozen boxes, everything becomes a little heavier. You forget to lift. And solid wood furniture, heavy bedroom sets, and refrigerators become even more difficult to move.

That’s when your floors are the most vulnerable. That’s when it’s easy to scratch your hardwood floors. And that can be an expensive endeavor to recover from.

If you’re planning a move anytime soon, keep these moving tips in mind before you move your first piece of furniture. With just a little forethought, you can avoid the problem, and have beautiful hardwood flooring in place when the last box is carried outside your door.Moving In Tips So You Don’t Scratch Your Hardwood Floors

Clean as you go

Cleaning is the least exciting job any of us do. And as you’re moving, clean-up takes on an entirely different meaning. Once the refrigerator is emptied, all you see is mess staring back at you. And what’s that in the back of the linen closet – how did it even get in there? Why not wait until the house is empty and start the cleaning process from front to back?

The same applies to the new place. You’ll clean when the boxes are finally gone. But that might not be your smartest move, especially if you want your hardwood looking their best.

No matter how hard you try, dust, dirt, small rocks, and other debris are going to find their way into your home. And when they find their way underneath your feet, a box, or the legs of a dresser or couch, they can cause scratches and deep grooves in the wood.

Stop what you’re doing from time to time and run a swiffer over the hardwood to capture these tiny particles and remove them. Now you can resume your move-in tasks.

Lighten the load

Moving is a lot more expensive than most of us think about. We often look at the big costs, forgetting all the nickel and dime tasks that add up along the way. That’s why many of us look to cut costs where we can – why not fill every box to the brim?

The problem with that is each box is more difficult to handle. You’ll increase the risk of dropping it. You’ll also increase the chances you drag it across the floor rather than lifting it up.

You should also empty drawers to lighten the load or your dressers and shelving units. It will decrease the likelihood of people dragging it to put it in its final resting space.

Hire the right people

Many people try and do a lot of the move themselves, hoping to save money. That increases the chances you’ll get tired and worn out, and will rely on dragging and pulling to get things into place.

At the very least, get as many friends as you can to help out. A few extra hands can get it done twice as fast, and eliminate the chances of dragging things because you’re tired.  Whenever possible, hire a professional moving company to get the job done the right way. If you can’t hire one for the complete move, at least consider it for your heavy furniture. This will make even the smaller job of moving boxes seem easier.

Create a softer surface

Set aside a variety of tools to help you move furniture and other big items into place. Towels, soft blankets, moving blankets, even small area rugs can be placed underneath legs and used to slide furniture into place. Just make sure each of the items is clean and free from dirt and other small particles, and that the soft side is always facing down to the floor.

And never use cardboard to move furniture. While it may make the item move a little easier, you’ll damage your hardwood just as quickly.

Move it on its side

Not every piece of furniture is best moved in its original position. If you have a large entertainment unit, for example, it might be better moved on its side.

This will also push you to empty drawers and take apart loose pieces, and better protect them for the move.

Avoid wheels

You’ll find a lot of moving tips tell you to invest in a good set of wheels. Place wheels underneath your heaviest furniture, and you can wheel it into place. We caution that advice. Sand, grit, dirt, and other debris can stick to wheels and drag it along as you move. It can create deep gauges on your hardwood floors.

Instead, invest in gliders; they are perfect for sliding heavy objects into place. You’ll love them so much, you can keep them around and use them to move your furniture easily for spring cleaning, or a little bit of redecorating whenever you please – new area rug anyone?

Fix problems immediately

Once you’re in place, all the furniture is moved in, and the last box is unpacked, walk around your home and take a closer look at your hardwood floors. Are there any scratches that happened during the process? Is there anything deeper than a scratch?

Don’t cover it up with an area rug, or push it aside to deal with “some other time.”

Fix it now. Call in a flooring expert and get the problem fixed, so your hardwood flooring looks great for many years to come.

Do you have any questions about your hardwood floors?

This post appeared first on https://pro-flooring.com

Disinfecting Your Hardwood Flooring

There are a lot of people with a lot more time on their hands right now. Many of us are at home a lot more than we usually are. In addition to having more time at home with their families, a lot of people are doing extra deep cleaning because of the coronavirus. One of the areas in your house you might have overlooked is your wood flooring. You can’t clean your hardwood floors the same way you do your other flooring, such as kitchen tile. Hardwood floors can have water damage if you use too much water, so you need to proceed with caution. What’s the best way to disinfect your hardwood flooring? We have some ideas.

Cleaning Hardwood

Why Do I Need to Disinfect?

Many of us are disinfecting our houses continuously right now to stop the spread of COVID-19. COVID-19 is the disease caused by a new (or novel) coronavirus. This virus is new, which means that no one has immunity to it in the general population. While most people who get the virus have a fever and cough, and then recover, others are not so lucky. A small percentage of people who get the coronavirus develop pneumonia. People that are elderly, or who have an underlying medical condition are particularly susceptible. The best thing that you can do to avoid catching the coronavirus is to practice social distancing and keep your house clean.

How Should I Clean My Hardwood Floors?

First, you need to know how your hardwood floor was finished. Different types of flooring have different finishes. Floors that are finished polyurethane, urethane, and polyacrylic are easier to clean, because they are finished to be stain and water-resistant. If your floors are finished with a poly or urethane product, you need to check your cleaning materials to make sure they won’t harm your flooring.

Now that you know what kind of finishing you have on your floors; you need to get started. First, you need to use a dry dust mop to pick up dust and other items–such as food particles–from your floor. Do this first, so that they don’t get stuck in your wet mop because that could cause scuff marks. Next, you can use a cleaner on your floor. Be sure that it is specially formulated for wood flooring.

Once your floors have cleaned and dried, you need to work to protect them. First, you can use runners and throw rugs in high traffic areas, to keep them clean and disinfected. Also, have people take their shoes off when they come to your house. That way, all of the dust, dirt, sand, bathroom and other remnants aren’t tracked through the whole house.

If it’s time for you to change your flooring, we have just what you need. Give Flooring.org a call today at 1.800.689.9006!

This post appeared first on http://www.flooring.org

Quick Guide to Subfloors

Your subfloor is the existing floor that is in your property.  There are a few different types of subfloors that you may come across.  It is important that you clean and properly prepare your subfloor before you start to install any kind of hardwood or bamboo floor. Read More

Don’t Let These Flooring Remodel Problems Get In Your Way

It’s easy to get sucked into wanting to remodel your home. After all, an afternoon spent on the couch with HGTV as your binge-of-choice will quickly show you all of the areas your home is currently lacking.

In many cases, it starts with the floor. Those stains and scuffs on your vinyl have been there far too long. The broken tiles aren’t just unsightly, they are also a tripping hazard. And did you ever think you’d be the one with the ugly shag in a color straight out of the 80s?

When most homeowners start thinking about installing new flooring, they start with a top desire. Thanks to many of the remodeling shows, they’ve pinpointed their top choices. But it might be a shock when you start calculating costs and have them fit your budget. That’s where many homeowners start to get into trouble.

You don’t want any regrets with your flooring choice, long before you’ve lived with it for any length of time.

But how do you ensure you won’t live with regret? What flooring remodeling mistakes should you know about, so you don’t make them yourself?

Don’t buy cheap flooring materials

For many of us, we consider ourselves to be great at bargain shopping. We’ll search extensively online for great deals. We’ll watch for sales and even try to talk our way into a better offer. That might work well for some things – you can always find another dress if you can’t get the one you’re after at a decent price. But for flooring materials, it’s a different story.

dont-let-these-flooring-remodel-problems-get-in-your-wayLet’s talk about one example we see quite frequently. A homeowner shops a big box store regularly, and notices a sudden flash sale offering engineered wood planks at an incredible price. They buy it up with the plans to install it themselves. Two questions arise from this situation:

What happens if you run out of materials, and the special offer is no longer in sight? Even the product is long gone off the shelves. In most cases, it was a special run just for the big box store. Even going back to the manufacturer won’t bring you any closer to finding a match.

Where is the material sourced from?  Because these specials are usually created in large quantities, and made for profit, they are often sourced from less than reliable sources. Do you want questionable materials inside your home?

The adage “you get what you paid for” applies here. If you want flooring that will last, talk to a flooring expert and thoroughly understand the product you are laying on your floors.

Don’t skimp on the installation process

Thanks to the HGTV channel, more homeowners than ever are jumping into the renovation process themselves. And it can be great fun.

It can also be a challenge. Nothing can be more frustrating than a home remodeling project gone wrong. And if your floors aren’t installed in the right manner, you’ll experience “wrong” very quickly. Wood floors can warp and buckle. Gaps between materials can be ugly at best. And if you don’t transition correctly from room to room, flooring material to flooring material, it can be downright dangerous too.

If you’re not sure what you’re doing, ask for help. Pay for a quality installer to do the job right the first time. It’s the best way to ensure you have a beautiful and functional home for many years to come.

Select the right type of flooring materials

It’s easy to get sucked into specific wants; we’ve all done it. (You’re thinking about that expensive orange dress you bought when you clearly can’t wear orange, aren’t you?)

You can give the dress away without a lot of heartache. You might have to live with your flooring mistakes for years to come.

If you’re looking at the trendy flooring because they showcased it on your favorite show, back away for a moment. Is it really the right choice for you?

Talk with one of our specialists; they can help you evaluate your needs, and process them separately from your desires. White carpet might not make sense if your family is growing.

Pay attention to how you live

Each flooring choice requires a different level of upkeep. You’ll have to vacuum carpet regularly to keep it looking its best. Hardwood requires a sensitive touch to avoid scratches, dents, and marks.

You should also think about what you do in each room. Do you always complain about spaces being cold? Or is the living space you workout in regularly simply too hard?

There’s a solution for each situation. And that’s where talking with a flooring expert can help.

If your space is always cold, going with a plush carpet might warm it up. Or if you’re set on hardwood or tile, have you ever thought of adding radiant heating below the surface? It might be the perfect addition to your flooring remodel.

Be realistic with your budget

This piece of advice works in conjunction with selecting cheap flooring materials. If you’ve seen an endstand at your local big box store, it’s easy to use those numbers when establishing your flooring budget.

That might not work at all.

Before you settle in on a number, stop by and talk with one of our flooring experts. We can give you real advice on how much it’s going to cost. Because we know the little extras most don’t count on when they set up their budget. Like padding underneath that plush carpet. Or the cost of removal of your old floor.

Is this the year for a flooring remodel?

It’s a great time to stay close to home, and make your home an even better place to hang out in. But avoid flooring remodel problems by thinking and planning a little first.

We can help. Give us a call today.

This post appeared first on https://pro-flooring.com

Renovation – Should You Do The Walls or Floors First?

What are the two biggest projects people take on when renovating rooms in their homes? Painting and flooring.

It makes sense. Those are two of the most powerful projects you can take on that will impact your home’s decor in significant ways.

In their own right, both are messy projects, especially if you’re making big changes.

  • Are you pulling down wallpaper?
  • Changing the texturing on your ceiling?
  • Adding new molding or wainscoting?
  • Moving from carpet to hardwood?
  • Have damage to your subfloor?

And what about all the problems you can’t see? You only have to watch a handful of the renovation shows on HGTV to know problems may be lurking right under the surface.

With all of that in mind, which project should you tackle first? Should you hire a painter to paint the walls, and bring in a contractor for the flooring second? Or should you have your flooring installed first, and finish the project with a new coat of paint?

Here’s our advice

Evaluate your projects

We’re assuming you’re having both of your projects handled by professionals. Neither your painting nor your flooring projects will be do-it-yourself.

Before you hire either, and set the schedule for the process, evaluate how much work needs to be done.

Renovation - Should You Do The Walls or Floors First?For the painting project, it’s a good idea to talk with your contractor to determine the work involved:

  • If you’re painting the ceilings, the workers will need ladders, and move them all over the room.
  • If you’re changing the texture, they may be scraping or spraying, getting fine dust throughout the room.
  • If you’re removing wallpaper or adding new, you may have glue and adhesive involved.
  • If you’re adding new molding, workers may have sanding and fine detailed work to do.

Flooring has its own share of to-do’s:

  • If you’re moving from one type of flooring to another, there will be prep work to the subfloor.
  • Depending on the flooring, the baseboards may need to be removed and changed accordingly.
  • New flooring can also change the height of the floor. Are the baseboards in the right location?
  • Unfinished hardwood requires a lot of prep work before they are finished, including sanding and staining. How will that impact the walls?

Best case scenario, if at all possible, we usually suggest prep work be done to the walls before the flooring is installed. The final paint job can be completed as the finishing touch after the flooring is in place.

However, this is a personalized process. If you’re working with a contractor, trust their advice. They will usually do what’s best to get you the results you demand.

Want even more information to make the right choice? Let’s look at the pros and cons of each.

Renovating floors before painting

Pros

Paint is one of the easiest ways to renovate your home. Painting it a different color can add elegance, give a room a dramatic feel, or freshen things up and make it appear lighter, airier. What’s more, if you get the color wrong, you simply select a different color and repaint. You can’t do that with your flooring. If you install new hardwood, it’s difficult to replace it right away with a different color choice. You might have to live with it for years. And once the color of the floor has been determined, it’s easier for a professional to ensure your paint has the same hue, and won’t clash as a final result.

If you’ve ever been a part of a hardwood renovation, you know how messy it can be. As the floor sander glides from corner to corner, it’s not unheard of for damage to be done to the walls. Chips and knicks are frustrating enough when your wall needs painting; it’s all the more so when the wall has just been painted.

Cons

The biggest reason not to refinish your floors before you paint is it’s easy to drip paint on a newly refinished floor. While you can use drop cloths to cover everything up, there’s always a chance the folds of the fabric can move and allow drops through and onto the floor. That would require work to remove the paint, possibly removing the varnish or top coat, and require time and money to fix the problem and bring your flooring back up to good condition.

Painting walls before renovating flooring

Pros

This is where it pays to plan ahead. If you have hardwood in place, and are sanding and re-staining, painting first can allow light paint splatter to be easily removed during the sanding process. This changes, however, depending on what flooring you’ll be installing. Paint splatters on new carpet fibers can be disastrous. Paint drips on porous tiles can soak in and change color. If you try and remove dried paint from vinyl, you might scrape the surface or remove the finish.

Depending on how high your ceilings are will determine what tools are needed for the job. Do you need ladders? Fans? Compressors? While a bucket of paint and a roller and paintbrush won’t cause a lot of damage if set down or dropped, larger equipment can cause more damage to your new floors.

Study your approach from all angles before settling in on the best method for you.

Cons

Paint spilled on some surfaces is harder to remove than others. Even if you are planning on re-staining your hardwood flooring after the fact, a deep color might penetrate the wood and be noticeable after you stain it.

Some flooring has a more difficult installation process, like unfinished hardwood. Dust from the sanding process can get all over a new paint job, even stick in some cases. And if you have a problem with installation, it might change the way our baseboards have been installed.

Which is best for you?

The final decision is based on your unique situation. If you’re using a contractor for both painting and flooring installation, trust their advice. Flooring almost always is more difficult for repairing and installation. If you drop paint on a newly stained floor, for example, it’s a mistake you might have to live with for the life of the floor. You might be able to sand out the paint, but if it stains, you’ll always see the spot every time you pass.

Take extra precautions, no matter which method you choose. It may seem difficult at the time, but it will more than make up for it in the long run.

Make your flooring renovation a fun project, one you’re proud of for years to come.

This post appeared first on https://pro-flooring.com

This website nor its owners are an actual service provider, this website is a referral service. When you place a phone call from this website, it will route you to a licensed, professional service provider that serves your area. For more information refer to our terms of service.

© FlooringServicesNearMe.com

(877) 959-3534